Monday, September 12, 2011

Vacation is Over

Well, it's time to get back to work.  We're settled into the new house, and the kitchen has been organized and re-organized.  With the weather starting to cool down, the kitchen is going to start heating up. 
 
And, since football season is officially underway (the Patriots kick off their quest for the Lombardi trophy tonight and my other favorite team, the Colts, will begin their quest next year - get well soon, Peyton), the Wannabe Foodie culinary adventures can begin.  I can't really explain why, but there is something about football that really makes me want to get in the kitchen and cook big, hearty meals.

Don't get me wrong - I did cook this summer.  My poor husband didn't starve.  We primarily took advantage of our new grill, with the occasional rainy day pasta boil.  I love, love, love cooking on the grill - tender and juicy meat, seasoned perfectly, and with the right amount of char.  Hmm... I'm going to have a hard time using the oven after that. 

But, cooking on the grill can get kind of boring.  Or at least, I got kind of boring.  I opted for lazy straightforward meals (meat, salad and baked potato or corn on the cob), and didn't try anything new.  But, there were a few highlights, a few questions, a few missed opportunities, and a few lessons learned.  Here's a brief rundown:

The new grill has a rotisserie burner, and the rotisserie accessory is one of our new favorite toys.  Rotisserie chicken cooked on the grill is perhaps the best way to cook a bird.  (Sorry, Ultimate Chicken Roaster, I had to say it.)  This will be our method of choice for a whole chicken all year round - even if that means that B has to stand outside in a blizzard.  It's just that good.

Why does everyone always talk about preventing flare ups?  All the cooking shows and cookbooks are always telling you how to cook things without flare ups.  Flare ups are my favorite part.  Flare ups improve the char.  Char is good.  Therefore flare ups are good. 

The grill also has a sear burner, which does a nice job of searing a steak before it goes on the grill to finish cooking.  Only problem is that the rotisserie attachment blocks the lid of the burner from opening, and then we can't use it.  Hopefully B realizes that I removed this part of the rotisserie before he next goes to use it.

Yesterday I made buffalo wings.  And I did them the right way - I cooked the wings and then tossed them in the buffalo sauce.  But they didn't come out so good.  I was disappointed - the wings were perfectly seasoned too, with fresh ground pepper, kosher salt, onion powder and garlic powder.  They didn't get a lot of char (again, my favorite part) and the sauce didn't stick so well.  Next time, I'm going to toss them in the sauce first, which I'm hoping will increase the char and caramelization (seriously - no idea how to spell that), and then toss them in the sauce again.  I'll keep you posted... I have not given up yet.

Our big missed opportunity was beer can chicken.  We have this every summer, down at the beach in North Carolina.  It's a specialty of a family friend, and it is delicious.  According to B, the dark meat (aka the part of the bird that is closest to the can of beer) really takes on the beer flavor, and the white meat (obviously, further away from the beer can) not so much - still absolutely moist, tender and delicious, but not so beery.  We had the idea to inject the white meat with some beer prior to cooking, and ran out to buy a beer can chicken roaster once we got home from vacation (one of those cheapo, $3 contraptions, not the high-fallutin' Williams Sonoma variety).  Sadly, we never got around to using it.  But, fear not, there is still time.  Consider this a delayed opportunity, not one missed quite yet.  And yes, I realize this flies in the face of my proclamation to only ever use the rotisserie to cook a whole chicken.

So that's about it for now.  I've got a lot of great things on the menu this month, along with a decent amount of time on my hands, so you can expect some interesting reads in the next few weeks. 

What's been going on with you guys?  Cook anything good this summer?  What were your grilling highlights and lowlights?  How do you feel about char?  And flare ups? 


Thursday, May 12, 2011

Homemade Vanilla Extract

In my Perfect Chocolate Chip Cookie post, I offered to share my homemade vanilla extract recipe with anyone who asked for it. And lo and behold, Michele asked for it!

The problem was, I couldn’t find the recipe. I knew I got it from a magazine, and I assumed it was Food Network Magazine. But after scouring six months worth of back copies, there was no trace of the recipe.

Then I googled it. A whole bunch of recipes came up, but none of them was the one I used. I knew this because every one called for a liter of vodka, and I don’t care how much I want to make my own extract, I am not giving up an entire liter of vodka to make that happen. (Note: this is also the reason why my attempt at homemade red wine vinegar failed.)

I resolved to e-mail Michele and let her know that I spoke too soon, and share one of the other recipes for her. But before I did that, I had to make a little progress on packing for my upcoming move.

And guess what I found? Yup, you guessed it – the recipe! For some reason, I determined that the logical place to put it was in my coffee table. Not my recipe box. Nor that folder where I keep random recipes. Not even written in the inside of a cookbook. My coffee table.

So here it is.

Homemade Vanilla Extract
Courtesy of Martha Stewart and Martha Stewart Living magazine.

Ingredients
  • One vanilla bean
  • 1/2 cup vodka
  • Glass vessel with a tight seal 

Method
  • Split the bean lengthwise with a sharp paring knife, and then use the tip of the knife to loosen the seeds by gently scraping inside the pod.
  • Pour the vodka into a clean glass jar with a cork stop or screw top lid.
  • Submerge the pod and the seeds, and leave them to soak at room temperature for one to two months.
  • Once the extract is ready, discard the beans and store the jar in the refrigerator.
  • It will keep for up to a year.

Generally speaking, it is probably not very cost effective to buy a vanilla bean for the sole purpose of making the extract. At my grocery store, it costs about $8 for a package of two beans. It also costs about $8 for a jar of good vanilla extract.

However, I have found that whenever I’ve needed a vanilla bean for a recipe, I’ve never needed more than one (usually only 1/2), so this is a great way to make use of the extra bean(s) before they dry up.

I did do a blind smell and taste test between my extract and the store bought extract (the good stuff – not the cheap, imitation kind) and the homemade version was much more fragrant and subtle in flavor. In fact, I assumed it was the store bought one because I couldn’t believe something I made at home would actually be better.

If you’re like me, and want to get a jump on planning your holiday gifts, Martha suggests beanilla.com as a resource that charges $13 for 10 vanilla beans. They also feature glass jars in the $4-$6 range. I used the 8.5 oz version of this jar available at The Container Store for $2.99.

Happy baking!

Tuesday, May 3, 2011

Cook's Illustrated's PERFECT Chocolate Chip Cookies

For those of you who are regular readers of this blog, you know how fond I am of all things America’s Test Kitchen. So imagine how excited I was to learn about their new Cook's Illustrated Boston Blogger Cookie Challenge.

Yup, you guessed right – seriously excited!! The challenge was pretty straightforward. Bake a batch of their Perfect Chocolate Chip Cookies, take some pictures, and blog about it. I could not wait to get started…

Yesterday was the day. I went to the market to pick up the ingredients (fresh is best!), charged the batteries in my new fancy camera, and got to work.

The first step, as always, is mise en place – getting all my ingredients measured, prepped and ready to go. I’m still surprised at just how much easier the entire cooking process is when I do this. No rushing to chop or measure something before it’s too late, no realizing you don’t have enough of some ingredient, and it even makes cleaning up easier. Not to mention, 9 out of 10 times, the food comes out better in the end.

Okay, mise en place done and now I’m ready to go. Just look how organized everything is!

The first step is easy – whisk the baking soda into the flour and set aside. Check. Even I can’t screw that one up.

Then come the steps that were a little new to me. I’ll confess, when I make chocolate chip cookies, I buy a bag of Nestle chocolate chips and follow the recipe on the bag. Other than throwing in some toffee chips and maybe some peanut butter chips to give it a little something extra, I normally stick to the tried and true. Why deviate from what you know works, right? (Blogging challenge, that’s why!)

First up is to melt the butter. What? Softened butter sure, but melted? That seems odd. But like I’ve said before, these guys know what they’re doing. Just go with it.

The Test Kitchen recommends not using a non-stick skillet for melting the butter because it’s difficult to gauge the brownness of the melted butter. Unfortunately, my non-stick skillet is brand new and my stainless steel skillet wasn’t quite camera ready after a bad experience with a veggie burger over the weekend. But I digress...

I watched the butter closely, taking the non-stick skillet warning very seriously, because I did not want it to over brown. If anything, it was probably slightly under-browned, but I think that’s better than the alternative.

I melted most of the butter in the skillet, then melted the remaining butter in the melted butter in a heat safe mixing bowl. (I will confess, I was not quite confident that my mixing bowl was heat safe, so I did clear the area in case an explosion occurred. Despite my history of kitchen accidents, this experiment turned out okay.)

When the butter was fully melted, I added the sugars, salt and vanilla to the bowl, then the eggs.  (Side note, I used my homemade vanilla. Vodka and vanilla bean - leave a comment if you want the exact recipe. This vanilla will stand up to anything you can buy in the store any day. I swear it.)

This stage of the recipe called for an interesting technique of whisking and resting, whisking and resting, and whisking and resting once more. Each whisk period was 30 seconds long, and then we would rest for 3 minutes. I used my oven timer to ensure I didn’t rush the rest period. At first, I found this a little bit annoying, but then I found the break really helpful as it gave me the opportunity to clean as I go without delaying the baking process.

Here are some pictures so you can see how the batter changes after each stage of whisking and resting. Also, my right arm could kick my left arm’s butt in a fight after the workout it got from all the whisking.

I couldn’t resist the temptation to taste at this point. Butter and brown sugar is kind of like heaven on earth – rich, buttery toffee flavors that are out of this world. Yum! I was starting to see (or taste) the genius of this recipe.

Now it’s time for the flour, then the chocolate chips. I opted to use chocolate chunks since I wanted to go for a bigger, gooier chocolate flavor.

The dough definitely looked and felt a lot more wet than your average cookie dough, but it made sense what with all the melted butter and all.

And it tasted pretty darn good.

Okay, it’s time to get that dough on the cookie sheets. Three tablespoons per cookie, and all I have is a two tablespoon ice cream scoop. I decided to use that ice cream scoop because even though it wasn’t the right size, it was still better than a spoon. I aimed for a 1 1/2 scoop fill, and it worked. I scooped out exactly 16 cookies – just what the recipe intended.

Time to bake. This is where I usually screw up. The recipe suggests 10-14 minutes per batch, turning halfway through. When I was a kid, I was told that you always bake cookies for less time than the recipe suggests. But in my older days, I have found recipe times to be far more accurate. So I split the difference and cooked the first batch for 12 minutes.

Halfway through...                    All the way through
You know, 12 minutes was slightly too long – at least it was in my oven. The cookies were still fine, just a tad darker than “golden,” if you know what I mean. I cooked the second batch for 10 minutes, and these came out perfect.

After a couple of minutes, I transferred the cookies to a wire rack to cool. This may sound like an odd choice, but I use a fish spatula for transferring still-warm cookies. It’s nice and thin, as opposed to all of my plastic and silicone spatulas which are pretty clunky and can do more harm than good. With the parchment paper on my baking sheets, there were no worries about scratching and the cookies transferred without issue.

Naturally, I couldn’t wait to try one. After I burned my mouth on some oozing melted chocolate, I decided to wait a few more minutes and try again.

Ah, this time I could actually taste the cookie. I think the “perfect” in the recipe title is an apt description. But let’s be fair. Here I am, awfully proud of myself. I may not be the best judge of my efforts.

Since there was no way I could fairly assess the outcome of these cookies, I had to wait for my favorite taster to come home. My poor husband barely got a chance to put his bag down before I was twisting his arm to try a cookie. He wanted to wait until after dinner, and there was no convincing him to eat cookie first, chicken later. (Um, hi, we’re grown ups – we can eat dessert whenever we want!)

But it was worth the wait. My husband’s verdict was music to my ears: crispy on the outside, chewy on the inside, big chocolate flavor. Yea me!! Well, really “yea Cook's Illustrated,” but I at least executed the recipe correctly so I do deserve a little credit.

At the risk of being accused of brown nosing the judges of this blogging challenge, I can honestly say it is the PERFECT chocolate chip cookie recipe.

To try the recipe for yourself – and I highly recommend that you do – visit this link to the recipe on the Cook’s Illustrated website. Try it once and it will be your go to cookie recipe. I promise.

You can also learn more about Cook's Illustrated and America's Test Kitchen by clicking here, and visiting their website.

Friday, April 29, 2011

Small Appliance Obsession


The one that
started it all.

I’ve had a thing for small appliances for some time. I think it started when I was in college. I saw a commercial for Presto’s Chip Shooter and proclaimed I had to have it. (And sadly, my then-boyfriend bought it for me for Christmas.) The Chip Shooter lead to a deep fryer, because despite the advertised delicious baked potato chips, they weren’t so delicious.

I guess it’s not so bad that I’m obsessed with small appliances. It could be worse. But I do have an awfully small kitchen, and this has lead me to buy small appliances, get rid of them when I run out of space, then re-buy them at a later time because I decide I need them again. And the cycle continues.

Here is a list of the appliances I can remember…
  • Chip Shooter
  • Deep fryer*
  • Bread machine*
  • Crock Pot
  • Toaster with an egg poacher
  • Hand mixer**
  • Stick blender**
  • Stand mixer**
  • Regular toaster**
  • Blender**
  • Popcorn popper*
  • Can opener
  • Food processor**
  • George Forman grill*
  • Mini chopper
  • Aero garden
  • Yogurt maker
  • Indoor grill (in addition to the George Forman ones)*
  • Quesadilla maker
  • Espresso maker
  • Coffee machines
Not the indoor garden solution.
One asterisk (*) refers to an appliance that I have bought, gotten rid of and replaced. Sadly, of the 5 listed, two of them I only still have. So yes, that means I have bought, gotten rid of, replaced and subsequently gotten rid of more than one deep fryer and bread machine. I still own a crock pot and a popcorn popper (two if you count my beloved Whirly Pop).

Two asterisks (**) indicate appliances that I got rid of due to an upgrade. Basically, when you have the opportunity to replace that generic brand with a KitchenAid product, you do it.

Today, in my tiny kitchen, I own a Keurig coffee maker, a hot air popcorn popper, a crock pot, a stand mixer, stick blender, food processor, and hand mixer. That’s it. That’s a lot of money wasted over the years. Or, as I like to refer to it, a lot of money recycled into the economy.

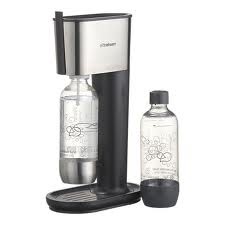
So I don’t blame my husband when he says that we should “hold off” on the keg-o-rater for our home bar, and that we should “wait a while longer” before we buy the Soda Stream (even though I insist it will pay for itself in 19 months if we use that instead of buying bottles of seltzer every week, and it’s more environmentally friendly because of all the plastic bottles I won’t use). My track record is not good. 

Did make a great egg sandwich,
but hard to clean.
At the end of the day, my love of a non-cluttered space wins out over my small appliance obsession. But here’s the thing…

We’re buying a new house. My tiny 8x8 foot kitchen with only is being traded in for a spacious 27’x15’ kitchen with 21 cabinets and 7 drawers, not including the space in the island!! I have plenty of room to cultivate and nurture my small appliance obsession. And even develop of a gadget fetish.

Sure, maybe I shouldn’t be spending money on unnecessary things while we get used to the bigger mortgage and weather all the unanticipated expenses that come with this house. But, really, won’t I be saving money by making my own seltzer and baking all of our bread? And draft beer is pennies on the dollar with your own keg-o-rater… it’s ordering it in a bar that is the money waster.

You're next, baby.
I don’t think my poor husband has any idea what he’s gotten himself into…


Friday, April 22, 2011

And the Secret Ingredient is...

B and I went to Ken’s Steak House in Framingham, MA for dinner last night. We’re doing the no carb thing right now, and we wanted a steak at a place that didn’t have a bar that would entice us to order a martini. So that pretty much left Ken’s as the only option.

Ken’s used to be the place to go, back in the day. Probably back in my grandparent’s day. If you go there now, it’s like a museum of that day. Nothing has changed in years – the carpet, the paint, the décor, the tables and chairs. Nothing. Well, I’m guessing the menu changed since buffalo wings are now offered as an appetizer and they didn’t exist back in my grandparent’s day. But they look old enough to be the ones my grandparents used.

Nonetheless, we thought we could still get a decent steak there, and probably not a decent drink. So this was the place for us.

The poor waiter endured our ordering – double vegetables, no potato (but not the green beans that are so sautéed in oil they might as well be deep fried). No B, you can’t have a tonic water – you need to go with the club soda (no sugar). Yes, you could have the regular Italian salad dressing.

I did explain to the waiter that we aren’t normally this picky, but we’re on a diet and need to avoid certain foods. (Then B asked him to please take the bread away.) I’m quite certain that he didn’t care.

Fast forward to our meal… I got the filet mignon with butternut squash and steamed broccoli. B got lamb chops with butternut squash and carrots. Everything was good. No complaints. Until…

After eating a few forkfuls of the squash, I noticed there was something in it. No, not sugar, which would have squashed my no carb diet. Something much, much worse.

It was a twist tie. You know what I mean – the flexible metal coated in plastic or paper that is used to tie up loaves of bread or the bag you filled with tomatoes in the produce department of the grocery store.

There was a twist tie in my squash. Or as I like to call it, trash. There was trash in my squash. I know chefs are experimenting with all sorts of new ingredients and techniques these days, but I’m pretty sure none of them would intentionally put a twist tie in a dish. And I’m pretty sure that any decent – or quite frankly, not so decent – establishment would take every precaution to ensure that a twist tie or other non-belonging item does not accidentally end up in a dish.

We immediately alerted the waiter – quietly, and without a lot of drama. He took the squash away and went to speak to the manager.

A few minutes later, the waiter was back to relay that the manager was sorry and he would like to treat us each to a free dessert.

Okay, I appreciate the gesture. Sort of. Not sure it really makes up for what I consider a pretty egregious error. Especially since we did say that we were on a diet. Now, as B said, the manager didn’t know we were on a diet. But the waiter was told, and apparently didn’t remember and failed to inform the manager that a free dessert may not be appropriate remediation. Needless to say, we declined the dessert.

At the end of the day, the meal was pretty average and the restaurant is so old and out of date that it looks dirty and rundown. Regardless of the twist tie in my butternut squash, we’re probably not going back to Ken’s. I think there day is done. At least for this diner.

But still… I’m kind of not okay with how the restaurant chose to handle this. While they did offer us something, I thought they didn’t offer enough. I wasn’t expecting to have our bill entirely taken care of, but I think they could have taken my meal off the check. Yes, the squash was the only thing that was a problem, but I didn’t really feel up to finishing the rest of my food after discovering the twist tie. I certainly didn’t want to order more food, so the dessert felt like empty compensation. And quite frankly, they should have at the very least offered to replace my side with another option. I basically paid for something I couldn’t really eat – BECAUSE IT HAD TRASH IN IT!

What do you think? Did they offer enough, or should they have done more? Have you ever found anything in your food at a restaurant that didn’t belong? What did the restaurant do to make it up to you, and hopefully keep your business? Am I being too hard on the waiter for not remembering that we were on a diet? The comment section is open, folks. I would love to hear about your similar experiences and if you think my expectations are on the money or out of line.

Tuesday, April 12, 2011

Becoming a Master Bartender


I signed up for a week long master bartending class. I had visions of me walking out with my bartending degree (okay, certificate, but I’m still getting it framed) and the ability to create glamorous cocktails that are prepared by throwing bottles in the air and catching them behind my back, a la Tom Cruise in Cocktail.

After the first day, my perception has changed. Surprising for me, I didn’t drop anything. Maybe because the first lesson was “don’t drop it, spill it, lose it, or give it away” and I was scared to death. (Even though all the waters are filled with water, colored to mimic the liquor or mixer they represent.)

By the end of the week, I should possess the skills needed to make drinks quickly, be a good partner in bartending (because your fellow bartender is as important to you as your customer), and hopefully able to remember some popular drink recipes. There is a test, and there is a lot to remember. I’m a little overwhelmed after just the first day. It’s been a long time since I had to study for a test. Time for flash cards!

So what motivated me to sign up for bartending school? Initially, I just thought it would be fun. It was something I always wanted to do, but it was difficult to find the time when I had a demanding full time job. Enter early retirement and suddenly my calendar is wide open! And I have visions of a really cool bar in the house that B and I eventually buy, with all the different glassware, even a signature cocktail that we’ll always have available to serve our guests. B already signed off on a wine fridge and a keg-o-rater, but I have some work to do on getting the soda gun installed. He thinks it’ll be a little too much trouble for a home bar. (He won’t say that when he has perfectly carbonated tonic water on hand 24-7. My B likes his gin and tonics.)

Plus, I’ve always been a huge fan of bartenders and their work. And after only one day, I’m even more impressed with what they have to know and do in order to be successful. I doubt I’ll ever be able to live up to the abilities of my favorites in the industry, but I can still tip my hat to them by trying to better understand their trade. Right?

And how cool will my bartending school diploma look framed hanging over my bar?

Hopefully I’ll be a better bartender (or drink maker, more realistically) by the end of the week. One thing is for sure, I’ll be a much more critical customer.